Thursday, July 3, 2014

Ramadan Lantern Card Tutorial

Not too long ago, I found these beautiful Arabesque lantern stickers from Jolee's Boutique.  I used a couple on some cards I've sold but I've kept a few around the studio because I can't stand to part with them. 

We used one of the stickers as inspiration to make our own stung up lanterns in this Ramadan Kareem card.

Today my helper was my 7 year old, who designed the middle of the lanterns herself when she decided my plain interpretation was too boring. I hope you agree that her adjustments are what really make the card.


Supplies
Various punches - 7/8 square, 1/2 circle, and flower designs
Corner punch (optional)
Twine
Blank card
Oval metal rings
Small letter stamps
Green ink
Glue
Five pieces of cardstock in bright colors

Punch out a circle, square and two flowers from each piece of cardstock.


Glue a circle punch out so that it is sticking out halfway on one of the sides of the square punch outs.  Glue a large flower in the center of the square with a smaller flower in the middle of it.

Once the lantern dries (this should only take a few moments if you are using Elmers like we are), flip it over and add an Oval ring to the top of the circle punch.

Your completed lantern will should now look like this.  Here is ours next to our original inspiration sticker.

While the back of our lantern was drying, we used the corner punch to cut out the edges of the card. This step is optional.  However, as someone who has corner punched cards for a bit now, it does make them look more elegant.

Our card will be going to an Arabic friend, so it needs to open left to right. So we'll be stamping our RAMADAN KAREEM on the bottom left of our card.  My child asked for a ruler so she can get the letters on there a bit straighter. If you don't have a clear ruler like ours, you can also use a regular one, just put it on the bottom of your card instead.

Put a dap of glue on the upper right corner of the card (where the fold is) and add the colorful twine. Wait for it to dry.

Carefully and gently lift the lanterns and add them one by one to the twine. Figure out the overall design and glue the lanterns down to the cardstock. Cut off the twine at the end and sign the back of your card with the date and your name.

This is a close up of the sentiment just to remind parents that children are the ones making this card.  If they mess up, keep encouraging them to move on because the stamping will not be perfect. Just enjoy the overall artwork.


Wednesday, July 2, 2014

Rub el Hizb Fabric Magnet Tutorial

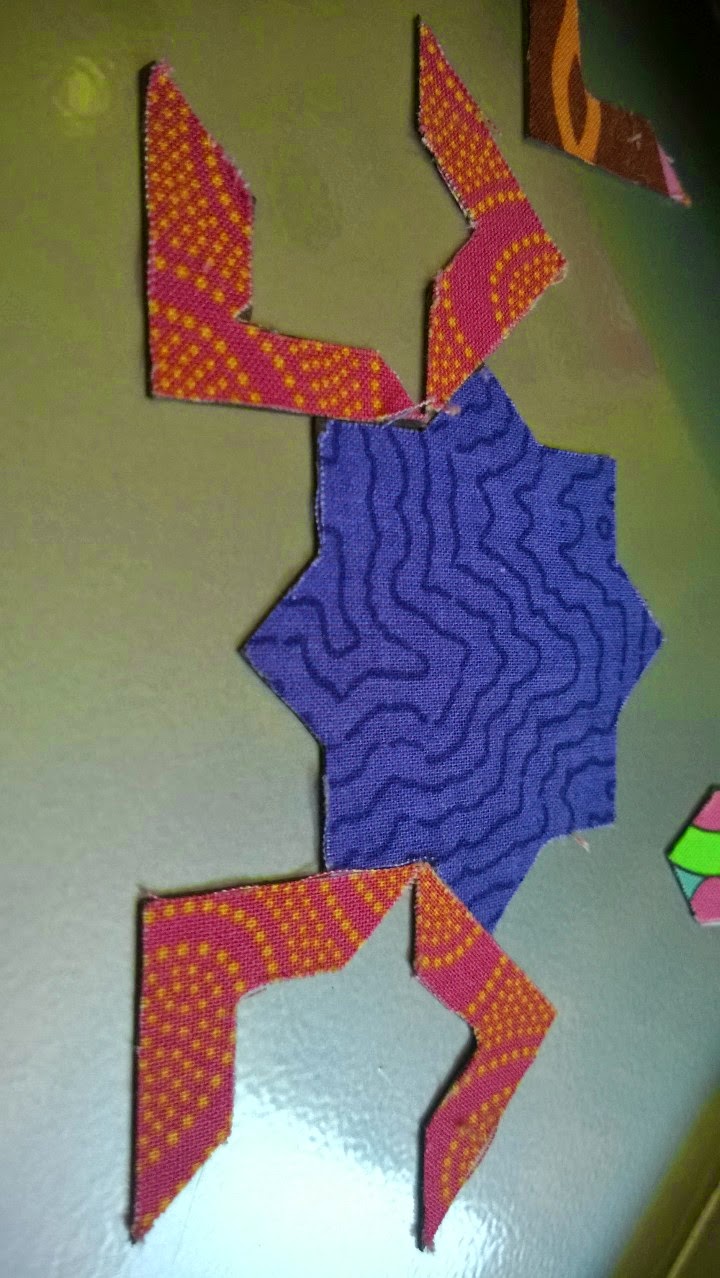
The Rub el Hizb is a Muslim symbol, represented as two overlapping squares. It is used a lot in Arabesque tile designs.

I recently got a new Friskers punch that you'll be seeing quite a bit of in the next month.  Today we used the punch to create this cardstock template to make these fabric magnets.

Enjoy today's photo tutorial!
Rub el Hizb Magnets

Supplies
Magnet sheet cut into 5x5 sheets
4 different fabric scraps
Pencil
Scissors
Rub el hizb cardstock template


Yes, it's that easy.  Here are some samples of our designs we created from all our pieces.


Tuesday, July 1, 2014

Ramadan Moon Sun Catcher Tutorial

Ramadan lasts 29–30 days based on the visual sightings of the crescent moon, according to numerous biographical accounts compiled in the hadiths

Making a sun catcher of a crescent moon is a fun way to share the story with the kids of how the Islamic calendar is lunar based.
Ramadan Moon Sun Catcher

(My middle daughter injured her hand this weekend, but still wanted to make this craft. So please excuse her bandage in the photos, but trust me, she is fine. :)


Supplies
Stacks of newspapers
Three sheets of wax paper
Towel
Iron
Star punch
Yarn
Hole punch
Ball point pen
Scissors
Pencil sharpener
Crayons in various colors

Lay out your stack of newspapers.  We had three layers and they still bleed through the first ironing, so feel free to put about 20 layers if you value your table. Lay your first layer of wax paper and start sharpening your crayons over the wax paper.  Try to lay out the shavings as random as possible.

Once you are satisfied with the amount of shavings and color variations, lay the second sheet of wax paper over the first and lay a towel over those two layers.

Totally panic when you realize your child is using your good towels (aka, the ones for taking food to neighbors) as a craft supply.  Try to remember that you are not allowed to scream on Ramadan and calmly take the iron away to replace the towel. Resume ironing.

Use your star hole punch to punch out seven letters with your white cardstock.  It might be cuter to also have your kids cut out the stars on their own. But with our hand injury (caused by an older sister, natch) we thought the punch would be easier today.

Using the ball point pen, write out the letters R A M A D A N. You can use different color markers, but do not use the crayons.

Lay out your letters on top of the two melted pieces of wax.  We used an old glitter visor as a guide on where to place the letters.

Place the third piece of wax paper over the letters, the old raggy towel that now has wax all over it (make sure the was is paper side down if you do have some on the towel).

Once all three pieces are ironed on each other, draw out a circle design with your ball point pen  outlining the letters.  Then draw a smaller off center circle inside.  Make sure you keep the circles apart (look at the first photo if you need to see how this is done). Cut out both circles and again, make sure you do not cut all the way through.

Add a hole punch at the top and tie a piece of yarn to hang in your window.

Here is what ours looks like now hanging in our window.


And a close up of the melted crayons around the letters.
Ramadan 2014 Kareem!!

Related Posts Plugin for WordPress, Blogger...