Wednesday, July 9, 2014

Eid Craft Stick Frame Tutorial

They say that imitation is the highest form of flattery, so I should feel honored today.

My daughter saw this wall banner in our living room and wanted to make one for the play room.  We decided to see what materials we had in the craft room to create her own design.  This is what she came up with today.
Eid Craft Stick Frame Tutorial
Supplies
Newspaper
Glue Dots
Xacto
Craft Sticks
Ribbon
Paint brush
3 flower cut outs
Paint
Glue
Solid cardstock
Printed cardstock
Pencil
Scissors


 Lay out your craft sticks and paint them one color. Allow them to dry.  Only do one side.

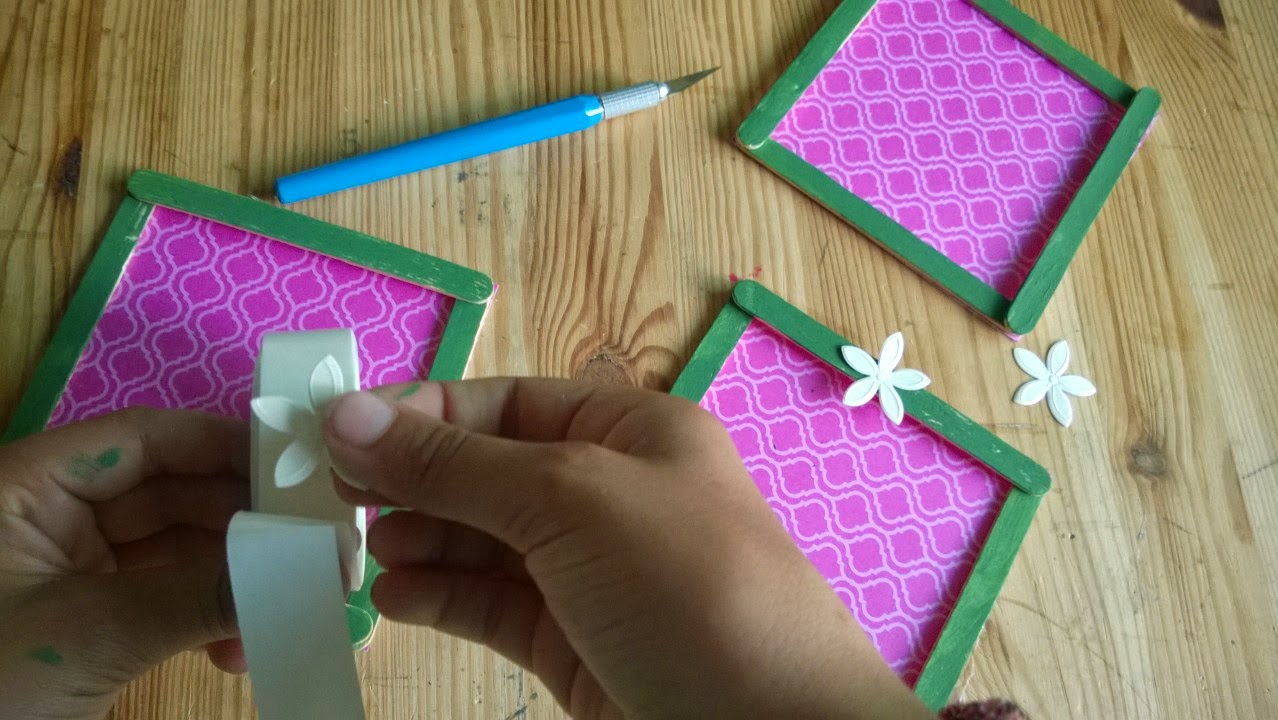
Make a square frame by placing glue dots on the underside of four craft sticks and add them togehter.  Lay your frame on your printed paper and glue it down.

Use your Xacto to cut off the extra paper behind your frame.

 Add a flower to the top of each frame.

Write out the letters E I D in large letters on the solid cardstock and cut them out.

Add glue to the back of each letter and place it in the middle of your frame.

Cut your ribbon into a 40 inch strip and fold it in half.  Lay out the framed letters over the ribbon and use the glue dots to secure them.

Hang up your sign, you are done!

Tuesday, July 8, 2014

Camel Glass Mosaic Bibelot Tutorial

This time of year is a good time to resolve to begin to widen your experiences. 

Today I did just that in trying something new by doing glass mosaics.  My daughter also made a glass piece and you can see it in the last photo.

All of the materials and tools were provided by Cheryl Smith Mosaics, who had come to our Girl Scout day camp to teach our troops how to create beautiful artwork in the sun.


Supplies
Glass cutters
Protective glasses
Protective gloves
Small paper plate
Colorful broken glass pieces
Diamond Glaze
Round glass ornament
Glitter
Wooden bamboo skewer
(I don't have a supply photo today because this project was done at stations.  I tried to take photos of all the items above.)

These were our choices for broken glass pieces.  There were also glass orbs, that have to be preordered from China a year in advance (!), but I didn't use any of those in my project. It took me awhile to decide what to make, but I final settled on creating a camel, my camp name, and two pyramids behind her.

I grabbed a small paper plate and picked out four colors for the camel, sky, ground, and pyramids.  I headed to the glass cutting table and put on protective glasses and gloves.


I was taught that the proper way to hold the cutters is with your left hand UNDER them to catch the two pieces.  I had to be reminded a couple of times about this since I'm used to placing my left hand OVER my wire cutters to protect from flying wire pieces.  I spent a little bit of time practicing on some spare parts before I felt confident enough to try the camel's legs, head and hump.

After my glass pieces were cut into the sizes I wanted, I headed over to another table where a wire drying rack were set up over an aluminum cooking pan.  I was given a glass flat ornament and a bottle of Diamond Glaze. I was instructed to cover the ornament with the glaze and then place a generous amount of glitter on top.

I then sent about creating my camel design over the glitter.  I had to make sure that none of the glass pieces were hanging over the edges of my round ornament.

After I was happy with the design, I added a generous layer of Diamond Glaze over it all to act as a grout.

I then placed a wooden skewer in the ornament hole to make sure the glaze does not glue over the hole.  My piece has to dry for 24 hours to make sure the glaze is set. Tomorrow I'll add ribbon though the hole to hang.

Here are some of the camper designed artwork.


Monday, July 7, 2014

Duct Tape Eid Sheep Earrings

If you are a client of mine over at Zibbet, you would know that I enjoy mailing my packages out with colorful duct tape.  My favorite as of late has been this particular black and white sheep design.

Today my middle daughter and I turned the last strip I have into earrings so she can still enjoy their humor.
Duct Tape Eid Sheep Earrings

Supplies
Scissors
Heart shape metal embellishments in two sizes
Earring posts
Oval rings
Silver duct tape
Colorful sheep duct tape
Pliers
Hole punch
Embellish tool
Xacto

Lay down a strip of silver duct tape, sticky side up, and fold over about a quarter inch from one of the edges.

Lay down a strip of your colorful duct tape over the silver duct tape, like the photo below.

Flip your duct tape over and add another strip of silver duct tape and flip it over one more time.  Add another strip of  colorful duct tape so that your piece of duct tape "fabric" looks like this:

Lay your heart shape metal embellishment anywhere on your design and use your tool to outline the shape.  Do the same with the second smaller heart shape metal embellishment.

Use your Xacto to cut out your sheep designs.

Use your hole punch to make two holes, one at the top and one at the bottom, of the smaller heart cut out.  Punch one hole out of the top of the larger heart punch out.
 

Add three oval rings to the bottom of the small heart cut out. Attach the large heart cut out to the last ring you just added.  You should now have your two hearts attached to each other.

Add two oval rings to the top of the small heart cut out.  Attach your earring post to the second oval ring.

Your completed earrings should look like this.

Insha'Allah everyone that sees them will want you to make them a pair!
Related Posts Plugin for WordPress, Blogger...