 |
| Khatam Gift Tag Tutorial by A Crafty Arab |
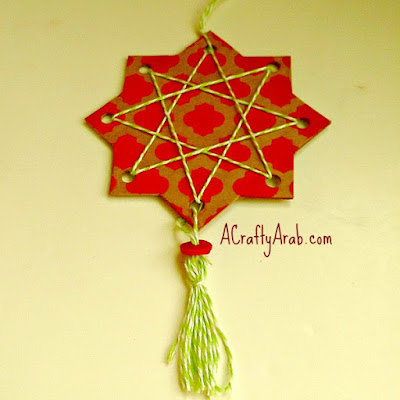
We had just finished our latest large box of cereal and when I was placing it in the recycle bin, I realized I could make something out of it. I gathered some supplies and came up with this Khatam gift tag. It was so easy to do, I'm gong to make a couple to have on hand.
Supplies
Double sided tape
Scissors
Chalk
Pencil
Bead
String
Hole punch
2 pieces of 3 inch square card stock
Recycled cereal box
Arabesque stencil
 |
| Khatam Gift Tag Tutorial by A Crafty Arab |
Place a piece of double sided tape in the middle of one of the 3 inch square card stock and offset it before placing it on the second piece to create an eight point star, also called a khatam.
Cut out one section of your cereal box and place double sided tape on one end and fold it over. Place the card stock khatam over the doubled up cereal box and trace out the design.
 |
| Khatam Gift Tag Tutorial by A Crafty Arab |
Cut out the shape.
 |
| Khatam Gift Tag Tutorial by A Crafty Arab |
Erase your pencil marks.
 |
| Khatam Gift Tag Tutorial by A Crafty Arab |
Place the khatam on another section of the cereal box and place the stencil over the shape. Chalk the design.
 |
| Khatam Gift Tag Tutorial by A Crafty Arab |
Punch holes in all eight points.
 |
| Khatam Gift Tag Tutorial by A Crafty Arab |
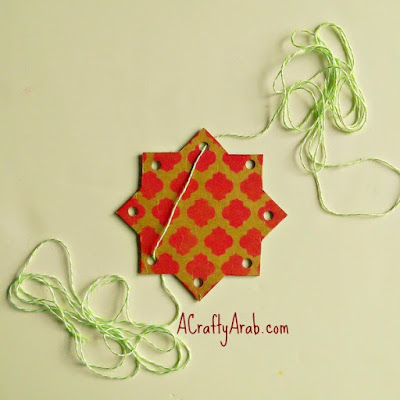
Cut off a piece of string, twine or embroidery thread about two arm lengths. Find the half way point and go through the khatam at the below two points.
 |
| Khatam Gift Tag Tutorial by A Crafty Arab |
Leave the top string alone for now, start going through the other holes, going back to two space from the top starting point. Then you'll go back through two space from your second entry point.
 |
| Khatam Gift Tag Tutorial by A Crafty Arab |
Keep stringing your star until you have a square design in the middle, like this. Your two strings should both be at the same hole, but coming in and out of different directions.
 |
| Khatam Gift Tag Tutorial by A Crafty Arab |
Take your longer string and redo the design, but this time creating a second square in the center. Your string should once again come to the same hole as the other string. Keep both strings tight and tie them together at the top. Go up about five inches, tie another knot and cut off the extra sting.
 |
| Khatam Gift Tag Tutorial by A Crafty Arab |
Wrap one of the extra string pieces around your fingers a few times.
 |
| Khatam Gift Tag Tutorial by A Crafty Arab |
Take the second string and tie a knot around the loop you just made.
 |
| Khatam Gift Tag Tutorial by A Crafty Arab |
Cut off any extra string about five inches from the top and use that to tie a little knot about a quarter inch from the top of the loop. Cut off the extra string from the second knot close to the knot.
 |
| Khatam Gift Tag Tutorial by A Crafty Arab |
Cut off the bottom loop of your tassel and attach your bead to the top. Make sure it has a big enough hole for two stings to go through.
 |
| Khatam Gift Tag Tutorial by A Crafty Arab |
Attach your tassel to the bottom of your tag.
 |
| Khatam Gift Tag Tutorial by A Crafty Arab |
If you'd like to buy handmade tags without doing the work, check out these cute Arabic Love Scalloped Circle Hanging Tags in my Zibbet shop.
To view more tutorials made with a khatam design, visit
Kirigami Khatam Tutorial
Origami Khatam Tutorial
Quilled Khatam Tutorial
Khatam Ramadan Matching Game Tutorial
Khatam Ramadan Window Clings Tutorial


No comments:
Post a Comment