Eggs are easy to make and can be cooked in about a hundred different ways, depending on what types of veggies and/or cheese you add. They are a good source of protein and that is important when you have to make it through a day on one dawn meal.
I was gathering this morning's eggshells in a bowl to take to the compote bin when it hit me that I was throwing away a craft material.
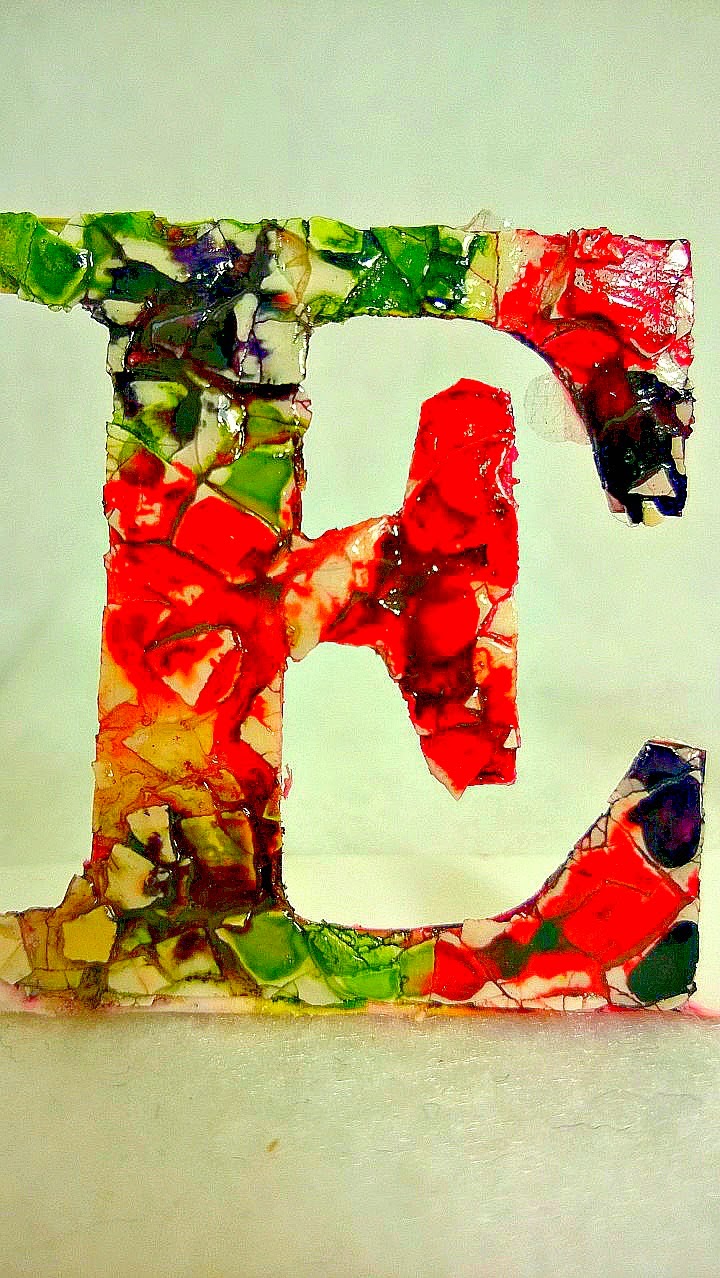
After a little research on the internet, I found a tutorial on what to do with all our eggshells. I decided to have the girls make these fun EID letters. Now we just need to figure out what to do with our end product. (Update - We added them to a gift bag)
 |
| Eid in an Eggshell Tutorial |
Supplies
Eggshells that have had the inside membrane removed
Water spray bottle
Thick (130# or so) white cardstock
Alcohol inks in green, red, purple
Mod Podge
Scissors
E I D letter stickers
Pencil
Paintbrush

Dry out your shells in the sun for a little while.
Enjoy your letters!
Lay out your stickers on the cardstock and outline the letters in a row, giving yourself room at the bottom. The next photo shows it best. This little area you leave at the bottom is a great help in holding your letters as you work on the project. Cut out your letters after all three are outlined.
Working with one letter at a time, use your paintbrush to generously lay down a layer of Mod Podge.
Lay your eggshell over the Mod Podge and press down to smash it on the letter. It's okay if you go over the edges. Keep adding Mod Podge and eggshells until your letter is covered.
Move on to the next two letters, but don't rush. Only work on one at a time. Once everything is done, cover it all up again with another layer of Mod Podge. Let it sit to dry for about an hour.
Flip your letters over and cut off any eggshells that are overlapping. Now you can see what it's nice having that extra paper on the bottom.
Spray your letters with water until they are wet, but not drenched. You don't want the water to dry, so you'll need to work fast on the next step.
Grab your first alcohol ink and add a few drops, moving in a random order. Keep adding more colors but make sure you leave a little white showing in your overall design.
After you are happy with your layout, spray on a *little* more water so the inks bleed into each other. Don't add too much, otherwise it will just get too muddy.
Here are the letters up close after they dried and we bent down our bottom edge to make them stand.
Enjoy your letters!
While Muslims have reached that special 1/2 point in Ramadan when we switch from pinning in our Ramadan Survival board to our Eid Décor boards on Pinterest, please feel free to add this tutorial to any of your own Pinterst boards!


No comments:
Post a Comment